Efficient editing is crucial for professional photographers. The time spent in post-processing can often exceed the time spent shooting, making a streamlined workflow essential for productivity and business success. This post outlines a step-by-step workflow to help you streamline your post-processing and deliver consistent, high-quality images to clients.
The Importance of an Efficient Workflow
A well-designed editing workflow offers numerous benefits:
- Reduces the time spent on post-processing
- Ensures consistency across images from the same session
- Minimizes the risk of losing files or missing deadlines
- Prevents creative burnout by making editing more manageable
- Allows you to deliver images to clients faster
- Creates a system that scales as your business grows
The key is developing a repeatable process that you can apply to every project while still allowing flexibility for creative decision-making.
Pre-Editing: Setting the Foundation
1. Organize Your File Structure
Before you begin editing, establish a consistent file organization system:
- Create a main folder for each client or project
- Use standardized subfolder names (e.g., "RAW Files," "Selects," "Final Edits," "Client Delivery")
- Implement a consistent naming convention for all files
- Consider including the date in YYYY-MM-DD format for easy chronological sorting

Example of an organized file structure for a wedding project
2. Back Up Your Images
Before you start editing, ensure your original files are securely backed up:
- Follow the 3-2-1 backup rule: 3 copies, 2 different media types, 1 off-site
- Automate backups whenever possible to ensure consistency
- Verify backups regularly to ensure files are properly saved
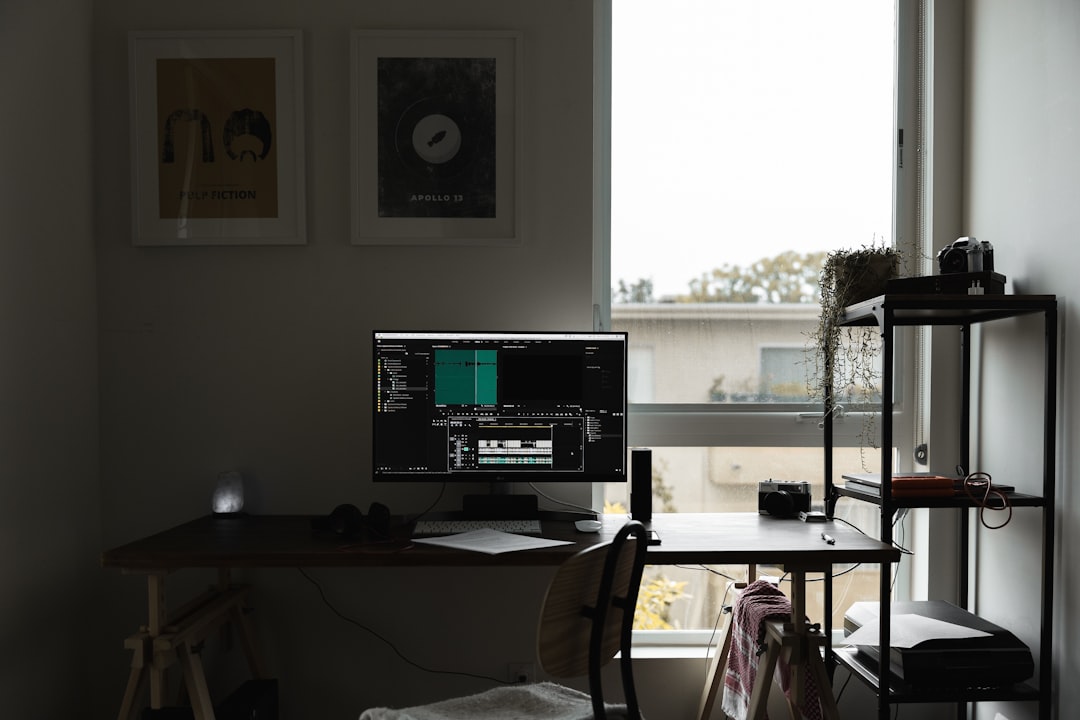
3. Set Up Your Editing Environment
Optimize your workspace for efficiency and accuracy:
- Calibrate your monitor regularly for color accuracy
- Work in a space with controlled lighting to avoid screen glare
- Customize your software workspace to put frequently used tools within easy reach
- Consider dual monitors for larger projects—one for editing and one for reference images
The Core Workflow: A Step-by-Step Guide
Step 1: Import and Organization
The first phase of your workflow should focus on getting images into your editing software and organized:
- Import images into your preferred catalog software (Lightroom, Capture One, etc.)
- Apply basic metadata during import (copyright information, keywords, location data)
- Add images to collections or use color labels to organize by project
- Rename files using a consistent convention if you didn't do so during transfer
Step 2: Culling—Making Your Selections
Efficiently selecting the best images is crucial for reducing unnecessary editing time:
Two-Pass Culling Method:
- First Pass: Quickly review all images, marking obvious rejects (blurry, badly exposed, closed eyes) for deletion and standout images for keeping
- Second Pass: Review remaining images more carefully, comparing similar shots and selecting the best versions
Consider using dedicated culling software like Photo Mechanic for faster review, especially for large shoots.
Culling process using star ratings to select the best images
Culling Tools:
- Star ratings (1-5 stars to indicate quality)
- Color labels (for categorizing by purpose or usage)
- Flags (picked/rejected for simple binary decisions)
Step 3: Basic Adjustments and Batch Processing
Apply global adjustments to all selected images before diving into individual edits:
Create a Base Preset:
- Apply lens corrections
- Set white balance
- Adjust basic exposure parameters
- Apply noise reduction if needed
- Make chromatic aberration corrections
Batch Process by Shooting Conditions:
Group images by similar lighting and settings, then apply appropriate base adjustments to each group.
Step 4: Image-Specific Editing
After batch processing, move to individual image refinements:
Prioritize Your Edits:
- Fix exposure and contrast issues
- Adjust white balance and color
- Apply cropping and straightening
- Perform local adjustments (dodging/burning, gradients, etc.)
- Address retouching needs (skin smoothing, blemish removal, etc.)
Image editing interface showing before/after of processing
Develop Consistency with Reference Images:
- Use a reference image to maintain consistency when editing a series
- Create virtual copies of challenging images to try different approaches
- Use synchronization tools to apply adjustments across similar images
Step 5: Advanced Editing and Retouching
For images requiring detailed work:
Selective Editing:
- Identify key images that warrant additional attention (portfolio pieces, client favorites)
- Export these selects to specialized software like Photoshop for detailed retouching
- Focus on retouching that enhances rather than dramatically alters the image
Non-Destructive Workflow:
- Use adjustment layers rather than direct adjustments
- Work with smart objects when possible
- Save files with layers intact (.PSD or .TIFF) for future adjustments
Step 6: Final Review and Export
Before delivering images to clients:
Quality Control Check:
- Review images at 100% zoom to check for artifacts, noise, or retouching issues
- Ensure consistency across the entire set
- Check crops and compositions one final time
- Consider having a second pair of eyes review important deliverables
Export with Purpose:
- Create export presets for different delivery methods (web, print, social media)
- Include appropriate color profiles for each destination
- Apply output sharpening specific to the final use
- Add watermarks if necessary for online sharing
Export dialog showing settings for different delivery formats
Advanced Workflow Strategies
Developing and Using Presets
Create a library of presets to speed up your workflow:
- Import presets: Apply metadata, keywords, and basic adjustments during import
- Development presets: Create style-specific presets for different types of photography
- Export presets: Standard export settings for various delivery formats
- Organize presets into categories for easy access
- Regularly update and refine presets as your style evolves
Tethered Workflow for Studio Shooting
For studio work, consider implementing a tethered workflow:
- Images transfer directly to your computer as you shoot
- Apply presets upon capture for immediate client preview
- Organize into collections during the shoot
- Make basic adjustments between setups to ensure you're getting what you need
Collaborative Workflows
For teams or outsourcing scenarios:
- Create detailed editing guidelines for consistency
- Use standardized flags or color labels to track progress
- Implement version control systems to prevent conflicting edits
- Establish clear handoff procedures between team members
Automating Your Workflow
Time-Saving Automation Tools
Invest time in setting up automations that will save hours later:
- Keyboard shortcuts: Customize and memorize shortcuts for frequently used commands
- Actions and scripts: Record sequences of edits for repetitive tasks
- Smart collections: Automatically organize images based on metadata, ratings, or other criteria
- Watched folders: Set up automatic imports or processing when files are added to specific locations
AI-Assisted Editing
Explore how artificial intelligence can enhance your workflow:
- AI-powered culling to identify technical issues or best expressions
- Automated subject selection and masking
- Smart noise reduction and sharpening
- Style transfer for consistent looks across images

AI-powered masking tool automatically identifying and selecting a subject
While AI tools can save time, always review their results carefully and be prepared to make manual adjustments when necessary.
Client Delivery and Archiving
Professional Delivery Methods
Complete your workflow with a professional delivery system:
- Use dedicated client gallery platforms for easy sharing and downloads
- Implement expiration dates on galleries to create urgency
- Provide mobile-friendly delivery options
- Include personalized notes or instructions with deliveries
- Follow up after delivery to ensure client satisfaction
Long-Term Archiving Strategy
Develop a system for managing completed projects:
- Decide which files to keep long-term (RAW files, final edits, PSD files)
- Implement a catalog system to make old projects searchable
- Consider cold storage solutions for completed projects
- Schedule regular maintenance of your archive (checking drive health, refreshing backups)
- Document your archiving process for consistency
Optimizing Your Hardware and Software
Hardware Considerations
Invest in equipment that supports your workflow:
- Prioritize RAM and processor speed for smoother editing
- Consider dedicated graphics cards for GPU-accelerated editing
- Use SSD storage for active projects and catalog files
- Implement a color-accurate monitor with adequate resolution
- Explore specialized input devices like editing consoles or tablets
Software Optimization
Keep your software environment running efficiently:
- Regularly clean and optimize catalogs
- Update software when stable versions are released
- Manage preview file sizes to balance quality and performance
- Purge cache files periodically to free up space
- Consider which modules and plugins you really need
Conclusion: Evolving Your Workflow
An effective workflow is not static—it should evolve with your business needs, technical capabilities, and creative vision. Schedule regular reviews of your process to identify bottlenecks or areas for improvement.
The most successful photographers are often those who can balance technical efficiency with creative vision. By streamlining the mechanical aspects of your editing process, you create more space for the artistic decisions that truly define your work.
Remember that the goal of an efficient workflow isn't just to work faster—it's to create consistent, high-quality results while reducing stress and preserving your creative energy for the aspects of photography you enjoy most.
As you implement these workflow strategies, adapt them to your specific needs and style. The perfect workflow is the one that works for you, allowing you to deliver exceptional images to your clients while maintaining a sustainable, enjoyable photography business.